LDAP Authentication
Table of contents
Overview
LDAP (Lightweight Directory Access Protocol) is a protocol designed to manage and access distributed directory information services over an Internet Protocol network. LDAP is used to store and retrieve data in a hierarchical directory structure, such as usernames and passwords, organizational units, and configuration settings. It facilitates directory management and authentication processes, allowing for a centralized approach to maintaining user credentials and policy settings. For comprehensive guidance on configuring and managing LDAP, refer to the official LDAP documentation.
Configuration steps for Enterprise, AWS and Team Editions
Step 1: Enabling LDAP Authentication
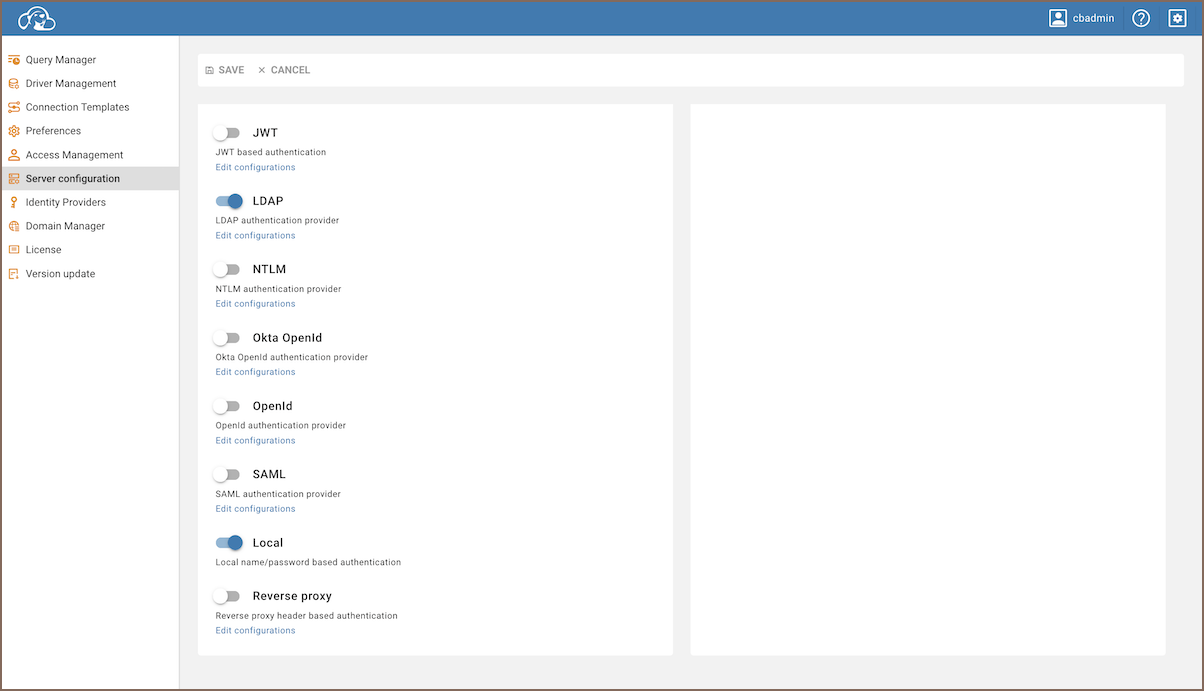
As an administrator, go to Settings -> Server Configuration.
Find and activate the LDAP option in the Configuration section.

Save the changes.
Step 2: Adding an Identity Provider
As an administrator, navigate to Settings -> Identity Providers.
Click on the + Add button.
Fill in the following fields:

| Field | Description | |
|---|---|---|
| Provider | Select LDAP from the dropdown menu. | |
| ID | Enter a unique identifier for the configuration. | |
| Configuration name | Enter a descriptive name for this configuration. | |
| Description | Provide a brief description of this identity provider configuration. | |
| Icon URL | Enter the URL of an icon to represent this provider. | |
| Disabled | Leave unchecked to enable this identity provider. | |
| Host | Enter the server hostname or IP address where LDAP authentication is handled. | |
| Port | Specify the port number used for LDAP communication. | |
| Base Distinguished Name | Enter the Base DN (Distinguished Name) for LDAP queries. Should be provided in the format appropriate for your LDAP directory, such as dc=example,dc=com |
Tip: You can specify organizational units within the Base Distinguished Name to streamline access, such as
ou=unit1,dc=example,dc=com. These can be set during the Identity Provider setup or during login in CloudBeaver.
- Click on the Create button.
Step 3: Logging in
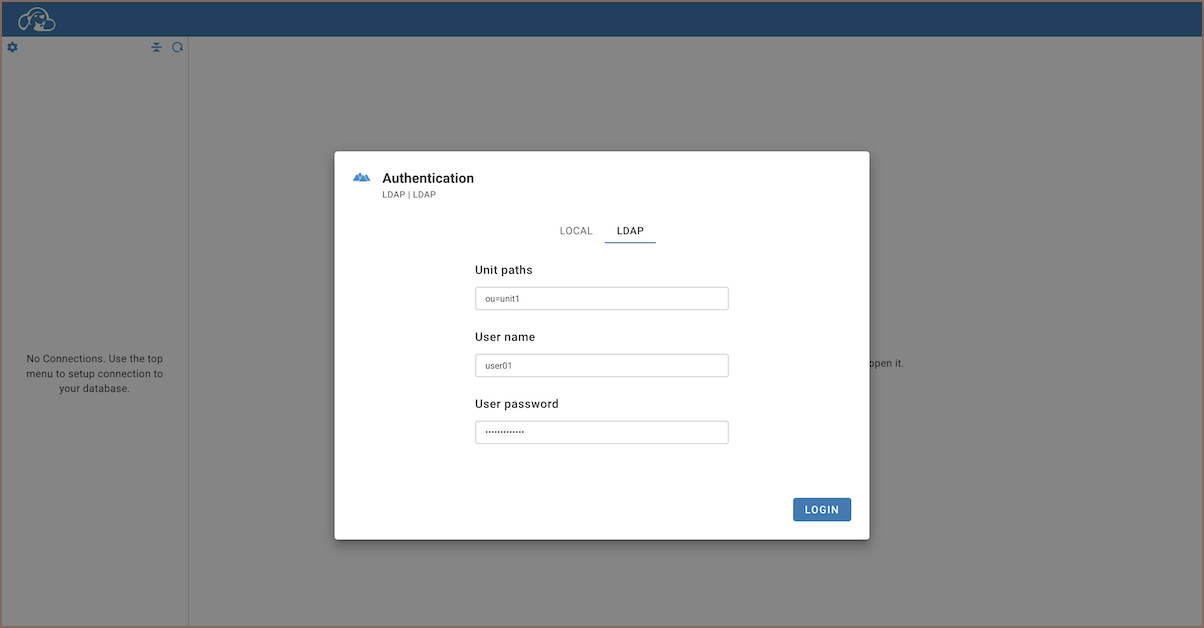
With the LDAP configuration now established, proceed to the login screen.
Select the LDAP authentication method.

In the Unit paths field, enter the LDAP unit paths separated by commas. This specifies the organizational units within the LDAP structure that your user credentials belong to. For example, if you are part of "unit1" and "unit2", enter
ou=unit1,ou=unit2.
Note: If you have already specified organizational unit paths in the Base Distinguished Name during the setup of your LDAP configuration, it is not necessary to fill them again in the Unit paths during login. However, this approach is more beneficial when managing a single user or a small number of users. For environments with multiple users spread across different units, it is recommended to specify the appropriate organizational units directly in the Unit paths field during login to ensure accurate user authentication and directory navigation.
- Fill in your User name and User password to log in.
Configuration steps for CloudBeaver Community Edition
In CloudBeaver Community Edition, configuration settings are not accessible through the user interface (UI). Instead, settings must be configured directly within the workspace configuration file.
Steps to configure LDAP in Community Edition:
- As an administrator, go to Settings -> Server Configuration and activate the LDAP option in the Configuration section.
- Locate either the
.cloudbeaver.runtime.conffile to configure LDAP for the current workspace or the.cloudbeaver.conffile to set the LDAP provider for all newly created workspaces. More details can be found in the server configuration guide. - Open the file with a text editor to modify or add LDAP configurations.
- Insert the following configuration snippet into your configuration file under the
app.authConfigurationssection. Adjust the parameters according to your LDAP server details.
"authConfigurations": [
  {
    "id": "ldap",
    "provider": "ldap",
    "displayName": "LDAP",
    "disabled": false,
    "iconURL": "",
    "description": "",
    "parameters": {
      "ldap-host": "ldap.example.com",
      "ldap-port": "1322",
      "ldap-dn": "dc\u003dEXAMPLE,dc\u003dCOM"
    }
  }
]
Important: Ensure that the
provideris set toldap.
After editing the configuration file, restart CloudBeaver for the changes to take effect.
