CloudBeaver Enterprise deployment in Google Cloud
Table of contents
Permissions
You need to have a list of permissions like this in your project:
compute.images.create
compute.images.list

compute.disks.create
compute.disks.resize
compute.disks.use
compute.disks.list

compute.instances.reset
compute.instances.resume
compute.instances.setMetadata
compute.instances.start
compute.instances.stop
compute.instances.suspend
compute.instances.update
compute.instances.use
compute.instances.setServiceAccount
compute.instances.create
compute.instances.attachDisk

compute.subnetworks.use
compute.subnetworks.useExternalIp
compute.networks.use
compute.networks.useExternalIp
If you don't have them, contact your system administrator or project owner.
Deployment
Deployment in Google Cloud interface
To deploy CloudBeaver Enterprise Edition in Google Cloud Console interface, you need to import CloudBeaver Enterprise Edition custom image to your account using the image URI, and then create a new instance from the imported image.
Step 1. Import CloudBeaver Enterprise Edition custom image on your GCP account
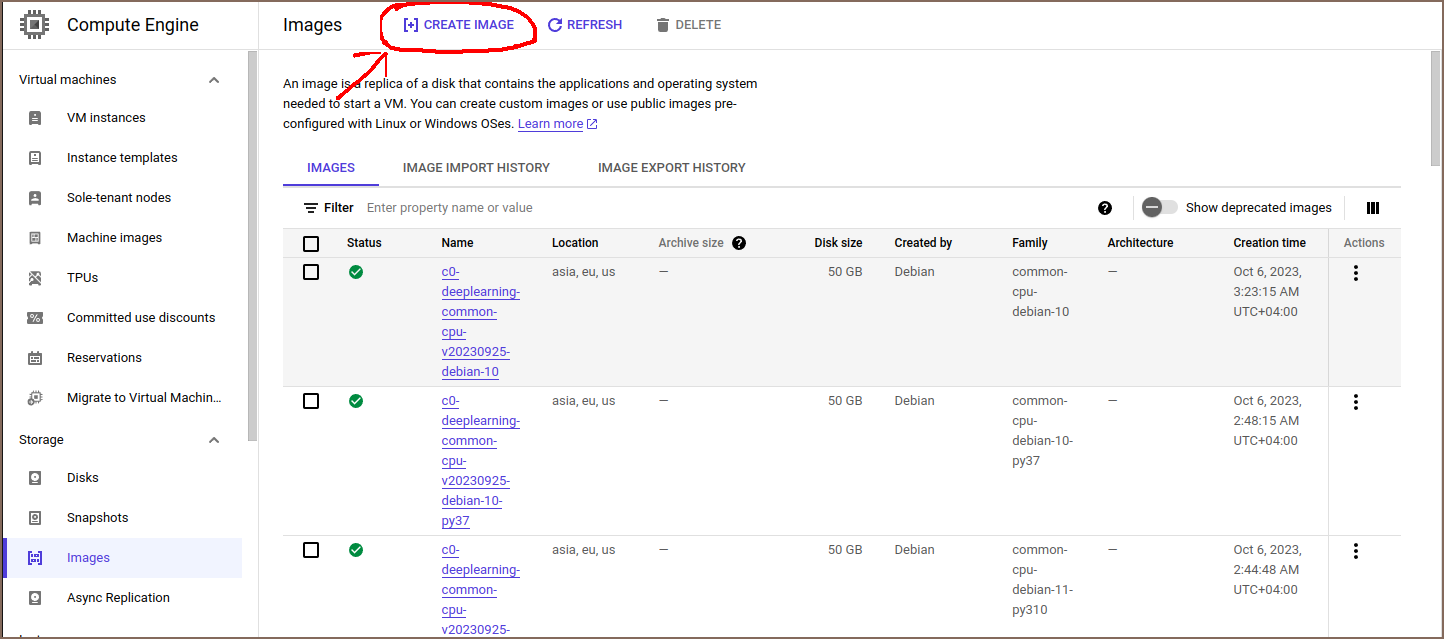
- Log in to your account in Google Cloud Console, navigate to Compute Engine -> Images, and click [+] CREATE IMAGE.
- Fill in the Create an image form:
- In the Name field write the image name in the following format:
cloudbeaver-ee-server-ubuntu/rhel-%version% - In the Source field select Virtual disk (VMDK, VHD).
- If you are prompted to enable Cloud Build tools and grant permissions, do so.
- Copy the following URI
cloudbeaver-ee-server/in the Virtual disk file field, click BROWSE, and select the version you need.
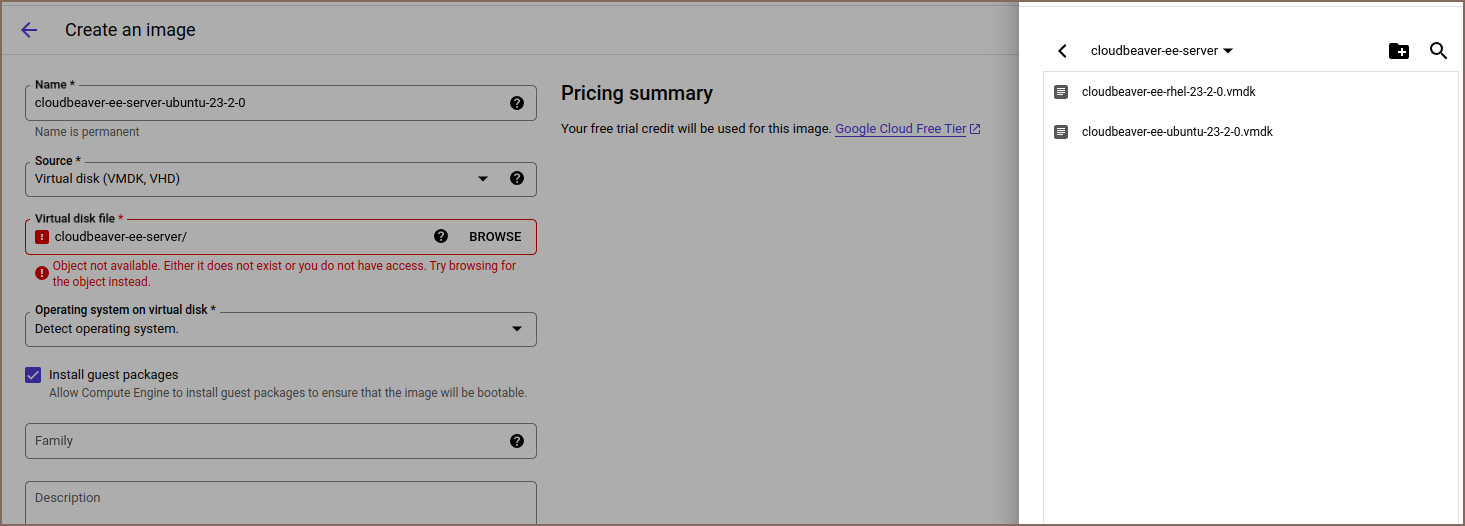
That's all done. The other fields are not required.
- Click Create. You may have to wait up to 15 minutes while the CloudBeaver Enterprise Edition server custom image imports to your account.

Step 2. Create a new GCP Compute Engine instance from the imported image
- Open the tab Images, click on the name of the image that you just imported, and click on the [+] Create instance button.
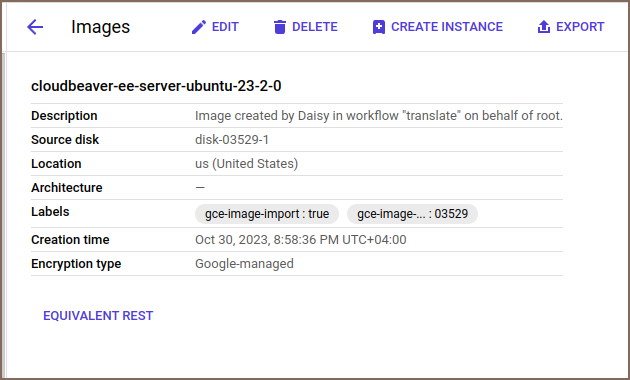
Give your instance a name
In the Machine configuration section, make sure to pick a "Machine type" with recommended memory and cpu (1 CPUs and 4GB RAM) to run CloudBeaver server.
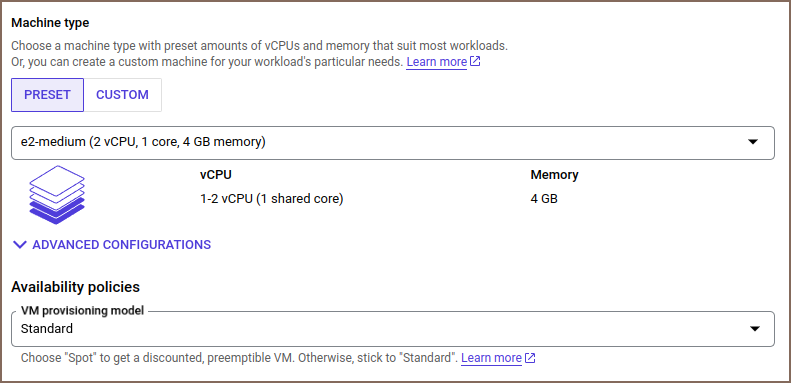
In the "Boot disk" section, click the "Change" button
From the "Custom images" tab, select the image that you just imported in the previous steps (cloudbeaver-ee-server-ubuntu/rhel-%version%) from the dropdown menu. Select a disk size of at least 100GB. When you are done, click on Select.
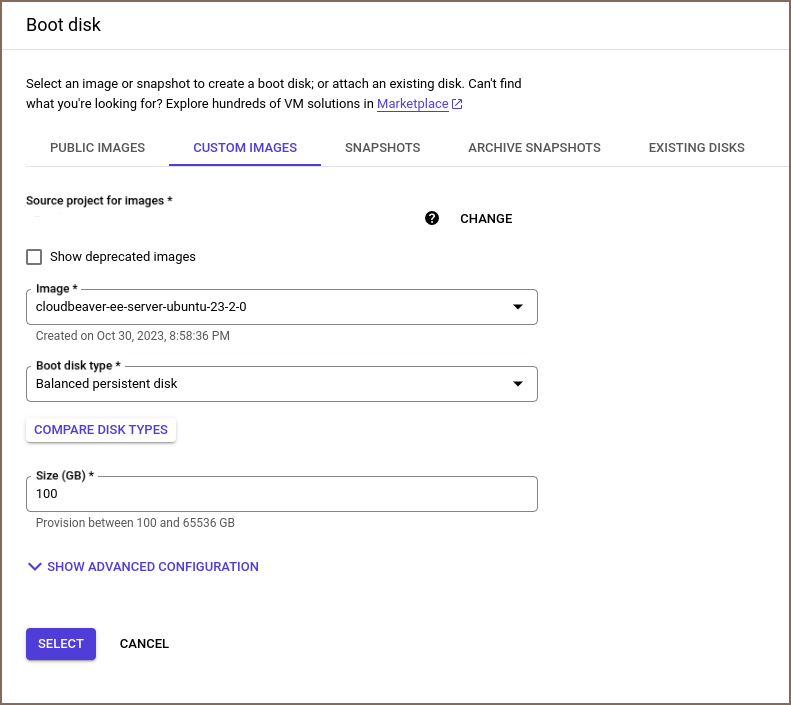
In the Firewall section, make sure to check the Allow HTTP traffic and Allow HTTPS traffic boxes so that your CloudBeaver server instance can be opened from internet.
Finally, click the Create button. After a few minutes, your Team Edition server instance should be up and running.

You can check that your instance is running correctly by copying and pasting the External IP address provided by GCP into your browser.
Deployment with Google Cloud CLI
- Log in to your account in Google Cloud Console, navigate to Compute Engine and click on Activate Cloud Shell.

If you are prompted to authorize, do so.
In the terminal that opens, enter the following command:
gcloud beta compute instances create cloudbeaver-ee-server \
--zone=us-central1-a \
--machine-type=e2-medium \
--tags=http-server,https-server \
--image=https://www.googleapis.com/compute/v1/projects/dbeaver-public/global/images/cloudbeaver-ee-ubuntu-23-2-0 \
--create-disk=auto-delete=yes \
--boot-disk-size=100GB --boot-disk-device-name=cloudbeaver-ee-server
Where:
zone- Zone of the instances to create. You can choose this from GCP zonesmachine-type- Specifies the machine type used for the instances. (1 CPUs and 4GB RAM resources recommended)tags- These tags allow network firewall rules and routes to be applied to specified VM instances.image- Specifies the boot image for the instances. You can choose any of our public images.create-disk=auto-delete=yes- Creates and attaches persistent disks to the instances. This persistent disk will be automatically deleted when the instance is deleted.boot-disk-size- The size of the boot disk, is 100GB recommended.boot-disk-device-name- The name the guest operating system will see for the boot disk.
CloudBeaver Enterprise Edition GCP public image list:
https://www.googleapis.com/compute/v1/projects/dbeaver-public/global/images/cloudbeaver-ee-ubuntu-23-2-0https://www.googleapis.com/compute/v1/projects/dbeaver-public/global/images/cloudbeaver-ee-rhel-23-2-0
You can change the parameters you need for deployment yourself. For detailed information on working with Google Cloud CLI, you can read the documentation.
Setup and control options
CloudBeaver Enterprise Edition server manager
cloudbeaver is a utility to manage a CloudBeaver Enterprise Edition server. Using this manager, you can start or stop the server, as well as update its version.
How to user manager:
- Connect to your server through the terminal.
- If you use terminal in browser window:
Entersudo su - ubuntuafter open terminal if you use Ubuntu version
Entersudo su - ec2-userafter open terminal if you use RHEL version
- If you use terminal in browser window:
- Enter
cloudbeaverorcloudbeaver helpto see the help menu.
Version update procedure
The update occurs with the help of the manager.
- Connect to your server through the terminal.
- Enter
cloudbeaver update list - Choose the version you want to update.
- Run this command:
cloudbeaver update %version%
